| Welcome, Guest |
You have to register before you can post on our site.
|
| Forum Statistics |
» Members: 53,715
» Latest member: Swig4646
» Forum threads: 68,123
» Forum posts: 1,054,640
Full Statistics
|
| Online Users |
There are currently 220 online users.
» 1 Member(s) | 217 Guest(s)
Bing, Google, EdL
|
|
|
| A box with a threaded top |
|
Posted by: jteneyck - 11-14-2024, 04:40 PM - Forum: Woodworking
- Replies (6)
|
 |
Just to learn how, I decided to try threading on my 3 axis CNC. VCarve Pro has a toolpath for doing that, so why not? First, however, you need to have a threading bit. I bought this one:
![[Image: AP1GczNfrJmlrnsInOQ4STxjDRwHlyu8YQfJsOpA...authuser=1]](https://lh3.googleusercontent.com/pw/AP1GczNfrJmlrnsInOQ4STxjDRwHlyu8YQfJsOpAXeAgz5UHbq7DnHejJ93vbwBwY1fVj7fU5pUnV_cEOLo5i9A01RIJ0HxoTneL6nRMNjjMxkabCwRB1eJKqfSWalUDsE15M7XciwNzDcfHDFXyuke69V6KaQ=w1445-h825-s-no?authuser=1)
It wasn't clear at first how to mill the threads so that the tip diameter of one thread would mesh with the root diameter of the other, allowing some slop factor. I think that would work had I milled the threads to give a land on them, like an acme thread, but I made V-shaped threads and for that to mesh I had to make the male thread one thread depth larger before cutting the thread. I'm going to cut some threads with lands on them to see if the logic is more straight forward. In any case, I was successful and the threads mate very smoothly.
![[Image: AP1GczMyk6-rR4QOdWSE2Vb27MZ823Rx08KunizR...authuser=1]](https://lh3.googleusercontent.com/pw/AP1GczMyk6-rR4QOdWSE2Vb27MZ823Rx08KunizRgdCUtEK-Cz_QNkE-PQTwhKWdAnSYAEcLh57tuMxDJkU8HQci1IRpSBECj8Oz4IgupRNlqDOyzv-jUaQ8eWpljuq1WMUeNFU0EgclIQ6QpN0mLh2XhwY82Q=w1565-h880-s-no?authuser=1)
The box is about 4" OD, with a UTS 1" thread I had to make the lid as two pieces, otherwise the threading bit won't cut deep enough. The thread wasn't cut quite completely on the threaded section, so it wouldn't fit down tight to the base, so I added the O-ring to take up the slack. Still learning.
![[Image: AP1GczOCo-rsxVrCKPIJeHkWzxFyZccNq5kwCRen...authuser=1]](https://lh3.googleusercontent.com/pw/AP1GczOCo-rsxVrCKPIJeHkWzxFyZccNq5kwCRenloCrx4-kOJs6aesS2UqKw3bKv2x4lmm1A1wppIBgPXOxmsZidol5rSGCpiE0gU_2Y0LKIeWGKzrDrGJ41IKKVtqnEfAg6Eg5zmLgE7E7d7Kthre6LF7XMA=w1565-h880-s-no?authuser=1)
![[Image: AP1GczNObmNnXmbi1YUiLLqxk5JarcSJRiacH3jf...authuser=1]](https://lh3.googleusercontent.com/pw/AP1GczNObmNnXmbi1YUiLLqxk5JarcSJRiacH3jfohUsIj6wkePQJKQeSlJNG4JoP7uIOLjClg3sXcXMY3fSf-n4KBQnFvFfAa782L2fdyl_5Y-jJOjEMfLwY067QHvQTIySUM9BYb5hKDAdaG8KL9Y93ynXIw=w1565-h880-s-no?authuser=1)
Normally, the lid has a female thread and fits over the male thread of the box. To do that, however, a back cut needs to be made below the thread for clearance, again because the shape of the tool doesn't allow it thread to the bottom of the recess. I managed to figure that out, too, but I need a narrow T-shaped bit before making more.
And that kept my brain engaged for a couple of days.
John
|

|
|
| Woodworking vice "pads" |
|
Posted by: toolmiser - 11-13-2024, 08:25 PM - Forum: Woodworking
- Replies (6)
|
 |
I picked up a couple woodworking vices at an estate sale this summer. Finally getting around to installing them. Previously I've used 3/4" "pine" to line the jaws. Do you use something like this or something harder, and is 3/4" a good thickness? By the way, my vice does occasionally get use for things that aren't woodworking.
Got any thoughts?
|

|
|
| November Knife Project |
|
Posted by: BrokenOlMarine - 11-12-2024, 04:26 PM - Forum: Woodworking
- Replies (8)
|
 |
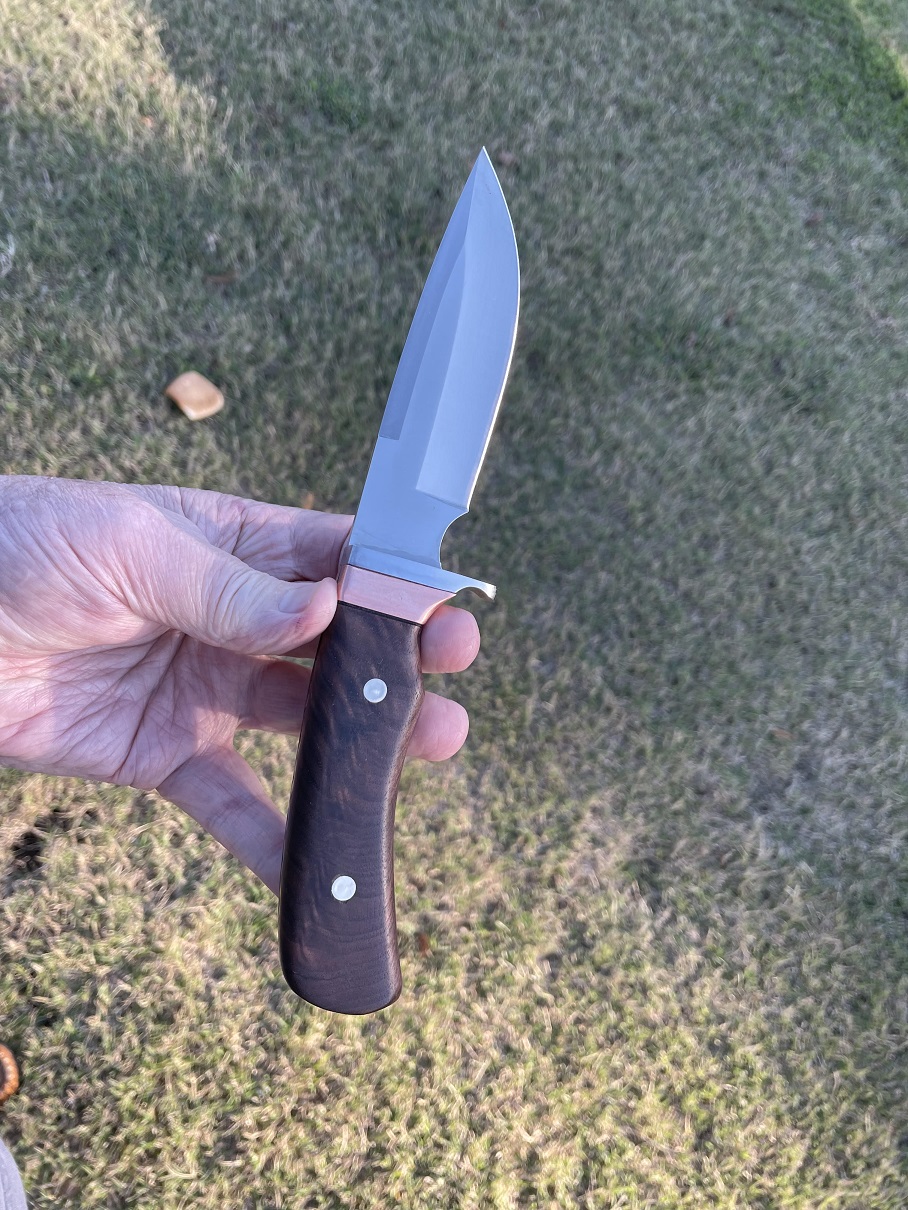
I didn't do this one as a buildalong, but thought I'd share the finished project.
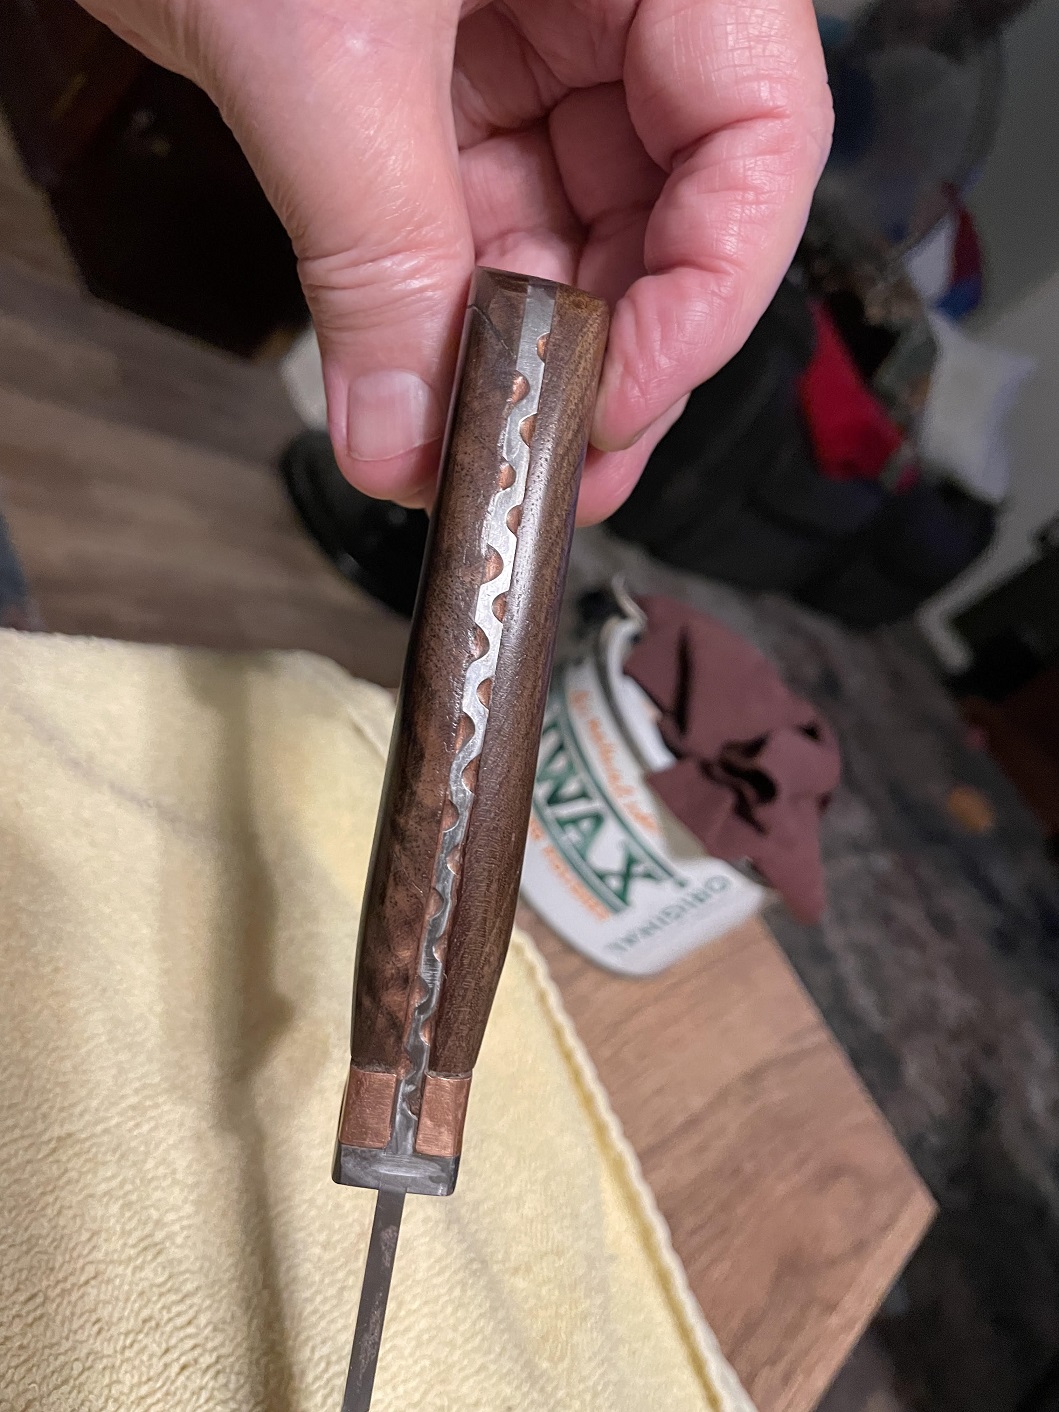
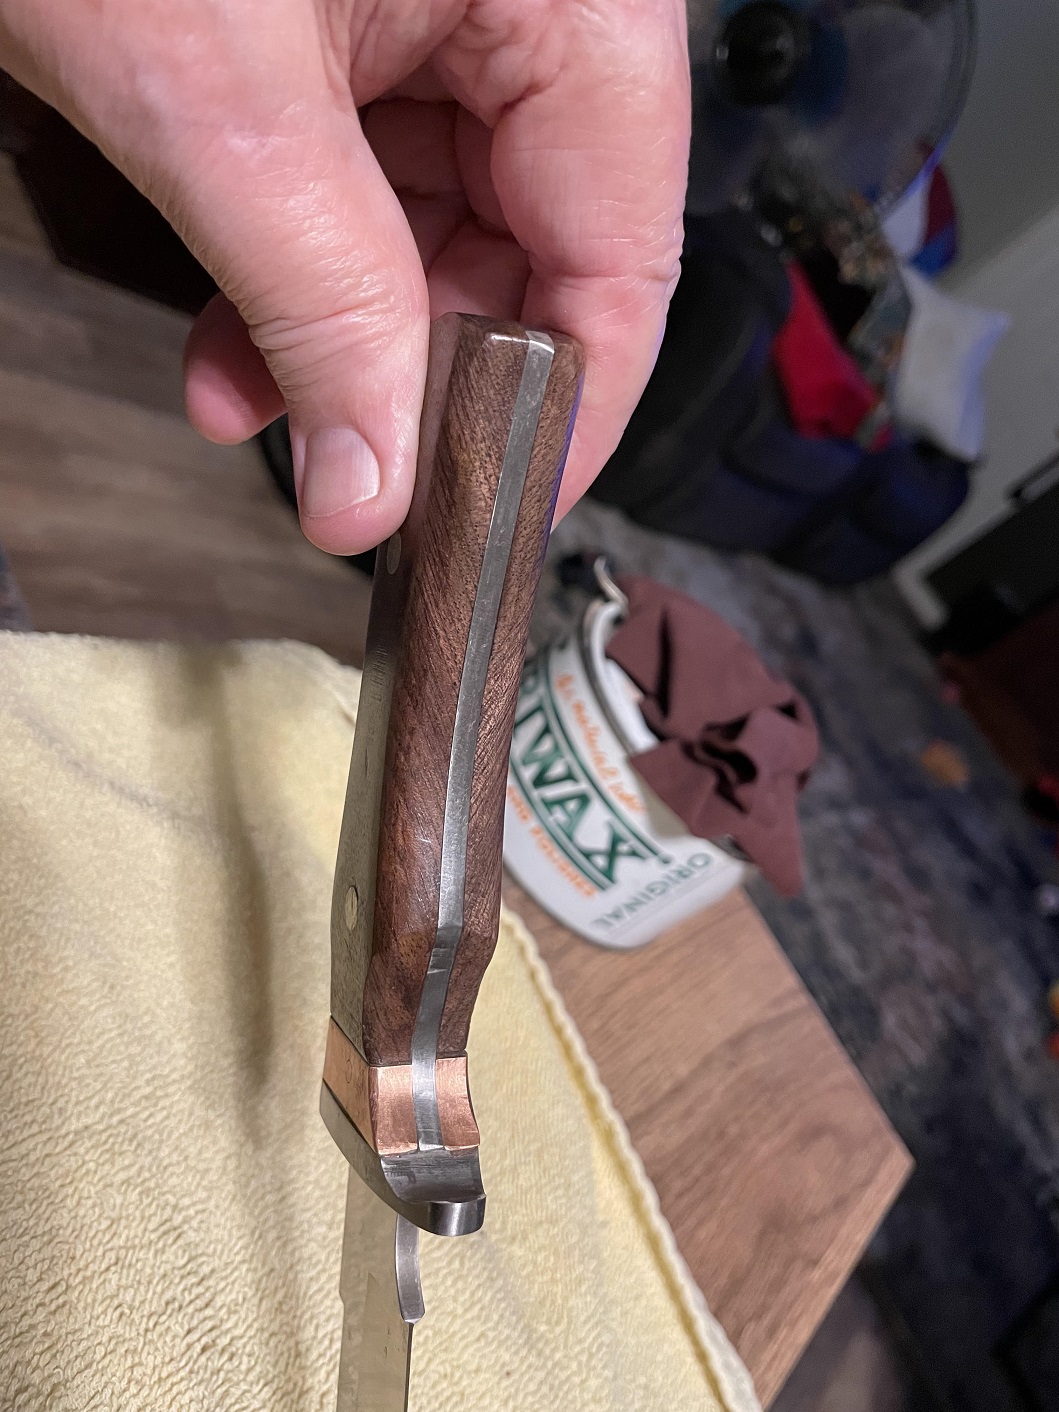
The knife is a nice little skinner. Stainless Guard, with a Copper accent I shaped from a BarStock piece of copper. The pins in the Highly Figured walnut scales are from round stock Nickel Silver. I spent hours laying out and tooling the spine on this knife and tried a new technique for filling in the tooling. I bought some metallic tint which I used on the epoxy I used on the scales and the copper accent and filled in the tooling accents on the spine then sanded it all smooth. I sanded the scales to 1500 grit and they got seven coats of beeswax, after treatment with Watco Golden Oak Oil finish. That Golden Oak really made the grain in the walnut pop. First a look at the spine's details.

Then a peek at the grain pattern in the belly of the beast.

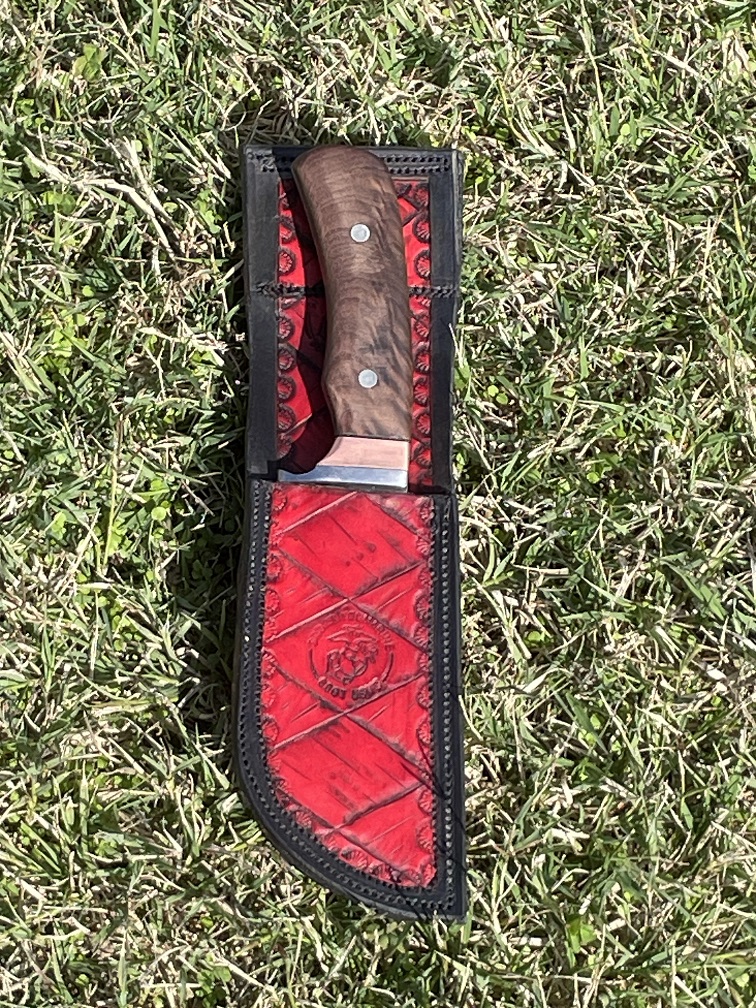
I made a sheath for practice as I am trying to learn to use my Cowboy 3200 sewing machine. This thing can sew harness thickness leather. Miss T can knock stuff out on it left and right, but she is a quilter and has a half dozen high end machines in her hobby shop... all top quality. She answers my questions and shows me how to do "things" on my machine, bought to sew belts and holsters.
I'm getting there. This was tooled, dyed, antiqued, and waxed. Came out pretty good for a leather rookie.

The knife itself? Yup, Miss T said it's looking good, so I'm good.

Like many of us, I look at the completed projects and see the small issues. I'm anal, a bit of a perfectionist. But... it makes me strive to improve on the next project. I guess that's not a bad thing, although it means I can't be satisfied in my work. LOL.
|

|
|
|